We covered this subject about 5 months ago, but have revisited it again to decide how best to incorporate this into a class setting. What we have decided is that there are a few set up or warm up movements that everyone will enjoy. These first pictures show those postures or dynamic movements.
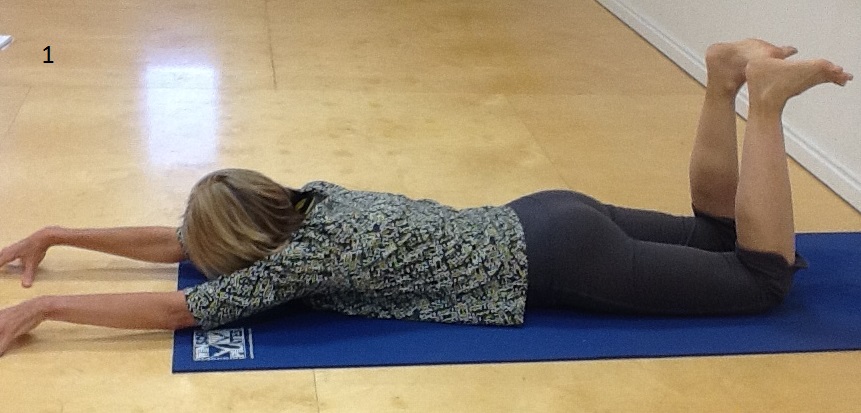
1)Prone “Tall Kneeling” Lie Prone on the floor with your mat underneath you. Reach arms up overhead with finger pads touching the floor and wrists slightly lifted off the ground. Bend both knees to a 90 degree angle with ankles in dorsiflexion. A student might want to put a block in between the lower legs to keep the proper distance between legs.
This pose is designed to prepare the body by activating the glutes, lengthening the hip flexors and creating traction for the spine.

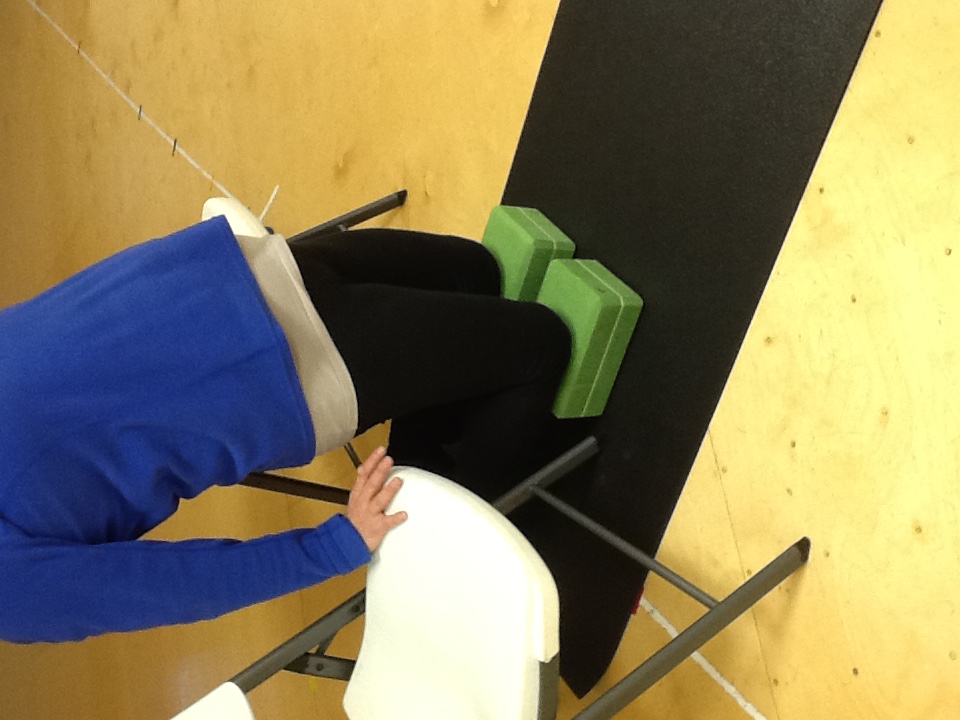
2) and 3) Set up with the 3 blocks then lift and lower seat to the block. The blocks on the sides can be placed wherever is comfortable for the student depending upon shoulder mobility.
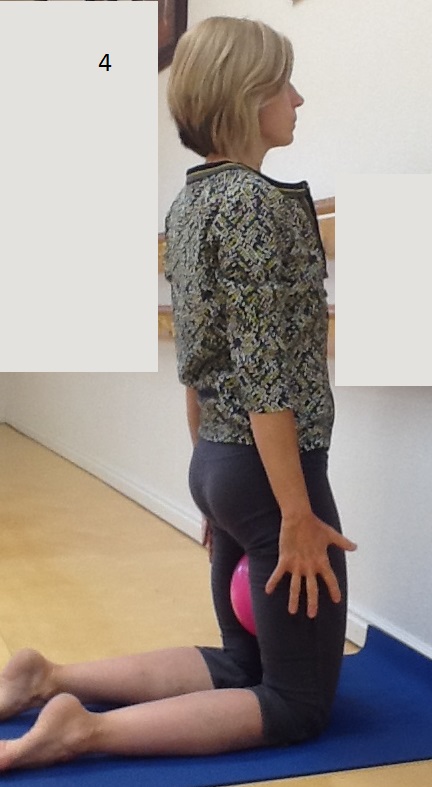
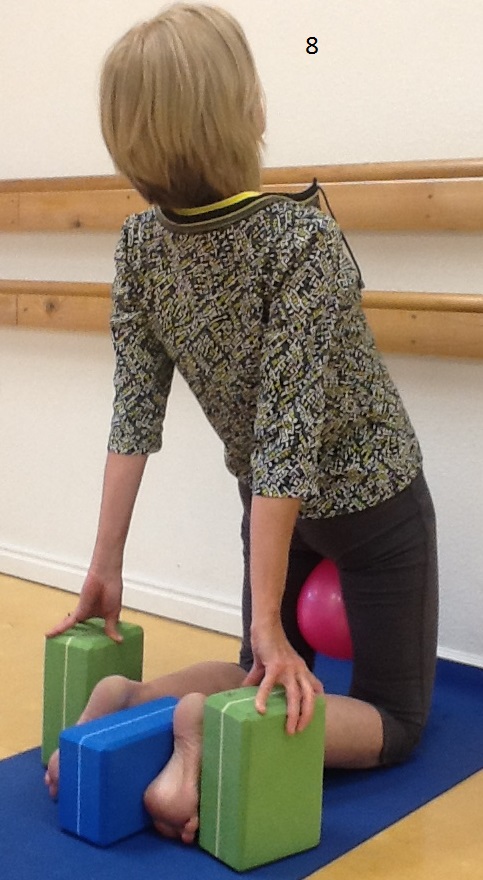
4) Put ball or blocks in between thighs and/or knees on the floor and also block between ankles. Student does not press into the blocks, they are just there as a point of contact for the legs and feet. Keeping the torso and shoulders still, core muscles firm and lean back. Stay for a breath or two and come up straight. This activates the front thighs.
##################################################################################################
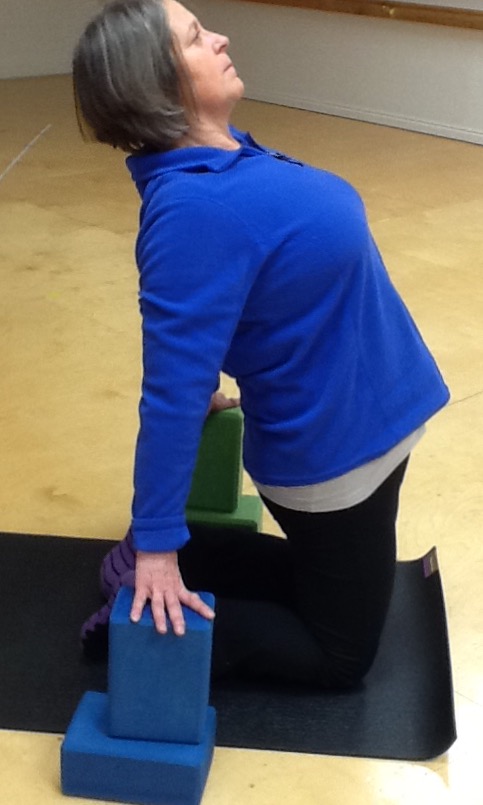
The rest of these pictures are different options for modified camel. In our classes, our students usually need modifications and props especially for back bends and so these are some great options. Those students with more mobility can just be guided into a traditional camel pose without the props.
The principle behind these options is to create the boundary and structure first with props and then within the structure the student can expand, breathe, soften, relax and enjoy the posture. The goal is to feel supported and able to stay in camel pose for 5 or more breaths with ease.
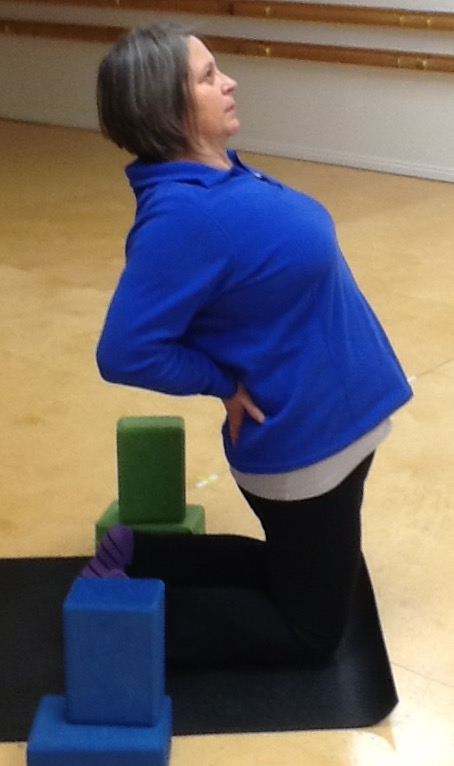
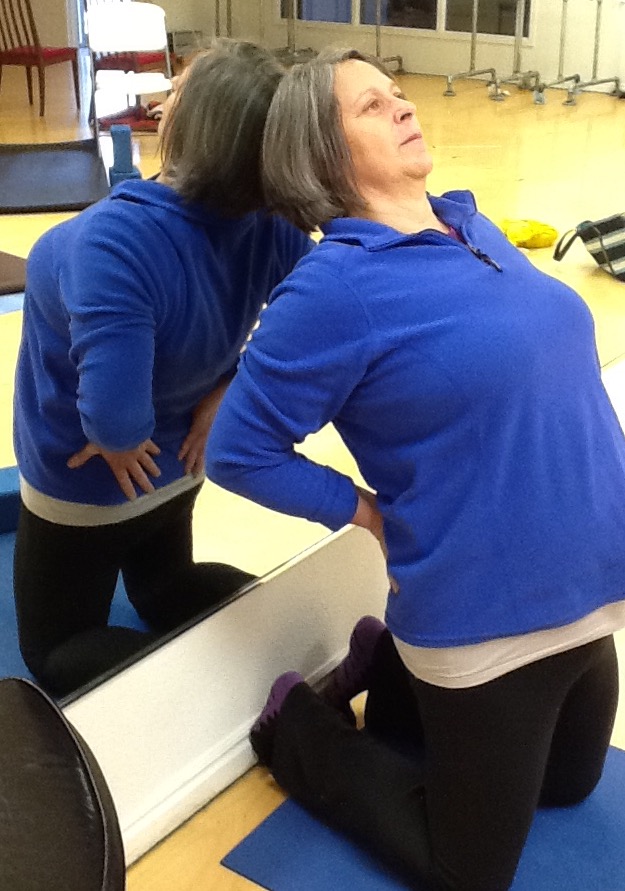
This first option with hands on the low back should be done without leaning back hardly at all. The hips are pressed forward but no leaning back. Shoulders rolling back and under. Heart centered lifted.
If there is any leaning back, the hands, arms or head need to be supported with props.
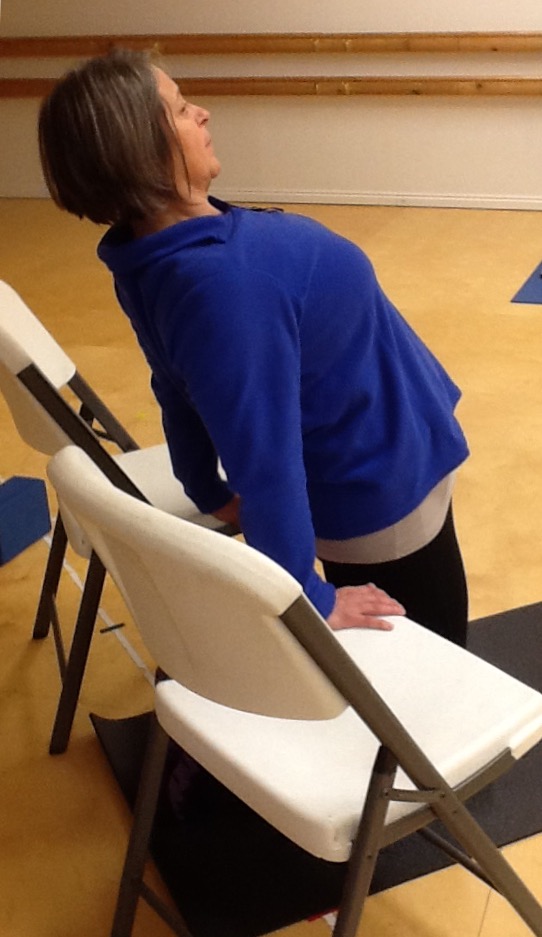
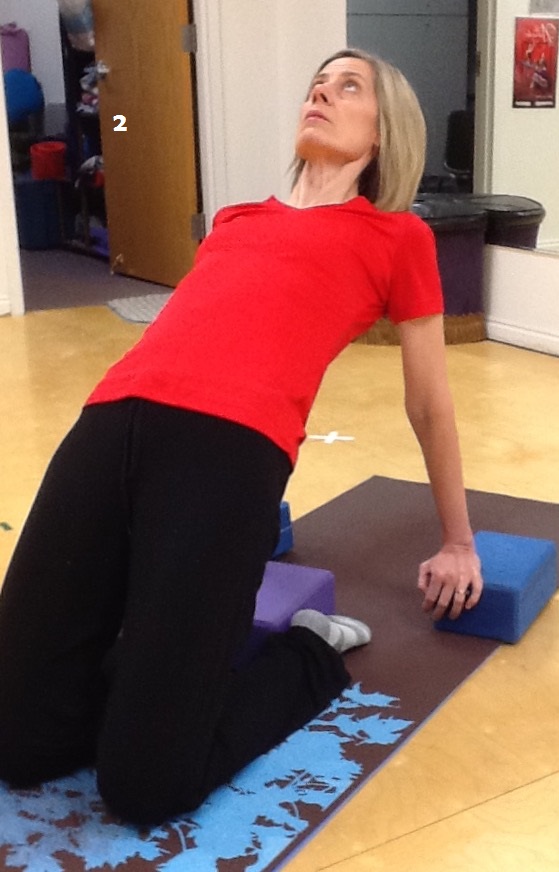
With this option of putting the head on a wall behind, it can be a bit scary going back and searching for the wall, so an option is to hold a block behind the head, lean back and find the wall, then move into the rest of the posture from there. There’s less strain in the neck with this option.
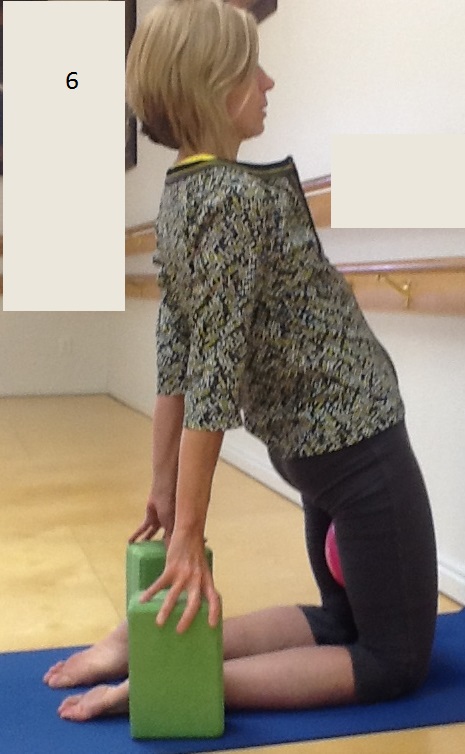
6) Place a ball or block between both ankles and begin to move back situating the blocks outside of both ankles. Engage the back, glutes and adductors as the hips gently press forward and you lean back to rest hands on the blocks.
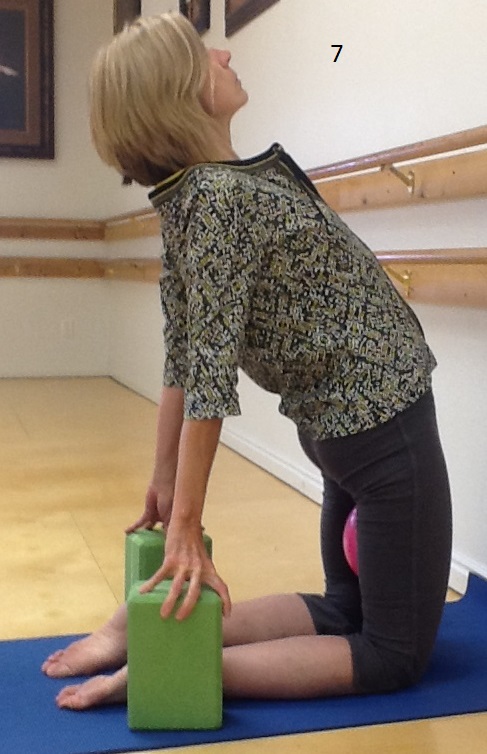
7)Head position should be comfortable without compression in the neck. Breathe easily and prepare to come back up by engaging back body, releasing grip on blocks and come up. If this is not available to you then practice not coming down so far on blocks. Another option will be bend the knees and return to Hero’s Pose.